
- 승률
- 0.0%
- 픽률
- 0.0%
- 평균 KDA
- 0.00
음전자 망토 개요
- 역할
- Duelist
- 경기
- 0
- 시즌
- 현재
- 방법론
- 데이터 방법론
Wade Wilson is the full package (or so he claims), with devastating damage output, an impenetrable shield, and swift healing. There's no limit to what Deadpool can achieve, as long as he keeps his moves flashy! And, of course, every epic attack comes with an endless barrage of witty banter!
음전자 망토 티어 등급
음전자 망토은(는) C-티어에 위치하며, 적절한 성능을 제공하지만 효과를 극대화하기 위해서는 좋은 팀 시너지가 필요합니다. 음전자 망토의 0.0% 승률이 평균 이하이지만, 숙련된 플레이어는 고유한 능력을 활용하여 여전히 성공을 거둘 수 있습니다. 음전자 망토은(는) 매치에서 0.0% MVP율을 기록합니다. Duelist로서, 음전자 망토은(는) 피해를 입히고 처치를 확보하는 데 집중합니다.
음전자 망토 상세 통계
음전자 망토 능력

- Damage
- 38 per hit
- Casting
- Rapid-fire projectile
- Ammo
- 30
- Fire Rate
- 2.5 rounds per second
- Damage Falloff
- Falloff begins at 18m, decreasing to 80% at 30m

- Ammo
- 40
- Projectile Speed
- 60m/s
- Beam Damage
- 46 damage per round
- Spell Field Range
- 3m radius spherical spell field
- Spell Field Damage
- 25
- Beam Attack Interval
- 2 rounds per second
- Projectile Attack Interval
- After every 5 beam bullets fired, the next shot fires 1 additional projectile

- Damage
- 36 per round
- Casting
- Rapid-fire projectile
- Ammo
- 30
- Fire Rate
- 2.5 rounds per second
- Damage Falloff
- Falloff begins at 15m, decreasing to 50% at 30m

- Ammo
- 40
- Projectile Speed
- 60m/s
- Beam Damage
- 42 damage per round
- Spell Field Range
- 3m radius spherical spell field
- Spell Field Damage
- 25
- Beam Attack Interval
- 2.5 rounds per second
- Projectile Attack Interval
- After every 5 beam bullets fired, the next shot fires 1 additional projectile

- Damage
- 40 per hit
- Casting
- Melee
- Attack Interval
- First strike: 0.6s; second strike: 0.53s; third strike: 0.6s
- Maximum Distance
- 4m

- Damage
- 45 per hit
- Casting
- Melee
- Attack Interval
- First strike: 0.5s; second strike: 0.43s; third strike: 0.5s
- Maximum Distance
- 4m

- Damage
- 30 per hit
- Casting
- Melee
- Attack Interval
- First strike: 0.6s; second strike: 0.53s; third strike: 0.6s
- Maximum Distance
- 4m

- Cooldown
- 6s
- Casting
- Jump
- Maximum Jump Distance
- 16m

- Damage
- 25
- Cooldown
- 6s
- Casting
- Jump
- Bonus Health
- 25, up to 50

- Cooldown
- 12s
- Ability Duration
- 5s
- Spell Field Range
- A cylindrical spell field with a 6m radius and a height of 6m
- Spell Field Damage
- 15/s
- Self Damage Reduction
- 20%
- Damage Needed to Remove the Disruption
- 100

- Cooldown
- 12s
- Ability Duration
- 5s
- Spell Field Range
- A cylindrical spell field with a 6m radius and a height of 6m
- Spell Field Damage
- 15/s
- Self Damage Reduction
- 35%
- Damage Needed to Remove the Disruption
- 100

- Cooldown
- 12s
- Ability Duration
- 5s
- Spell Field Range
- A cylindrical spell field with a 6m radius and a height of 6m
- Spell Field Damage
- 10/s
- Damage Needed to Remove the Disruption
- 100

- Cooldown
- 12s
- Ability Duration
- 5s
- Spell Field Range
- A cylindrical spell field with a 6m radius and a height of 6m
- Spell Field Damage
- 10/s
- Damage Reduction (Self)
- 30%
- Damage Reduction (Allies)
- 20%
- Damage Needed to Remove the Disruption
- 100


- Damage
- 40
- Cooldown
- 2 charges, with each charge taking 10s to recharge
- Casting
- Dash
- Dash Duration
- Up to 12m

- Damage
- 40
- Cooldown
- 2 charges, with each charge taking 10s to recharge
- Casting
- Dash
- Dash Duration
- Up to 12m

- Damage
- 40
- Cooldown
- 10s
- Casting
- Dash
- Dash Duration
- Up to 12m

- Cooldown
- 10s
- Casting
- Single-cast projectile with delayed impact that also generates a spell field
- Projectile Speed
- 80m/s
- Projectile Damage
- Unleash: 30; return: 25
- Spell Field Range
- 4m spherical radius spell field
- Spell Field Damage
- 15/s
- Spell Field Duration
- 1s

- Cooldown
- 10s
- Projectile Speed
- 80m/s
- Projectile Damage
- Unleash: 30; return: 25
- Spell Field Range
- 4m spherical radius spell field
- Spell Field Damage
- 15/s
- Spell Field Duration
- First unleash: 1s; second unleash: 1s; third unleash: 2s
- Third Unleash Explosion Damage
- 45

- Cooldown
- 45s
- Healing Over Time
- 25/s
- Healing Over Time From Activated Healing Factor
- 50/s

- Casting
- Weapon swap to pistols

- Cooldown
- 12s
- Summons' Health
- 300
- Maximum Duration for Summons
- 4s

- Cooldown
- 12s
- Summons' Health
- 400
- Maximum Duration for Summons
- 4s


- Casting
- Weapon swap to katana


- Cooldown
- 45s
- Movement Boost
- Upon activation: 15%; challenge completed: 30%
- Ability Duration
- The challenge lasts 12s. The buff lasts 6s after you complete it.
- Healing Over Time
- Upon activation: 35/s; challenge completed: 70/s

- Cooldown
- 45s
- Damage Boost
- Upon activation: 15%; challenge completed: 30%
- Movement Boost
- Upon activation: 15%; challenge completed: 30%
- Ability Duration
- The challenge lasts 12s. The buff lasts 6s after you complete it.
- Healing Over Time
- Upon activation: 50/s; challenge completed: 60/s

- Cooldown
- 45s
- Ability Duration
- 8s
- Damage From Per Ability Missed
- 60

- Cooldown
- 45s
- Ability Duration
- 8s
- Damage Over Time
- 25/s
- Damage From Per Ability Missed
- 60
- Vulnerability Ratio From Ability Missed
- 10% for each stack. Up to 4 stacks.

- Cooldown
- 45s
- Casting
- Targeted
- Ability Duration
- 8s
- Damage From Per Ability Missed
- 45
- Bonus Health Per Ability Missed
- 80
- Bonus Health Gained Upon Activation
- 200
- Healing Over Time During Activation
- 50/s

- Cooldown
- 60s
- Casting
- AoE self-buff
- Bonus Health
- Self: 200; Allies: 50
- Ability Duration
- Challenge: 12s; buff: 6s after completion
- Boost Spell Field Range
- 6m spherical radius
- Healing Over Time (On Activation)
- 50/s
- Movement Speed Boost (On Activation)
- 15%
- Healing Over Time (Challenge Completed)
- 100/s
- Movement Speed Boost (Challenge Completed)
- 30%
음전자 망토 팀업 능력

- Anchor
- Deadpool
- Team-Up
- Mr. Pool's Interdimensional Toy Box
- Partners
- Elsa Bloodstone, Jeff the Land Shark
- Team-Up Bonus
- +50 Max Health
음전자 망토 중심의 최고의 팀 짜기
팀 조합 연구소는 양 팀을 한 보드에 올려 활성 팀업, 2인 시너지, 역할 밸런스, 상대 조합 대비 영웅별 매치업 우위를 실제 경기 데이터로 보여 줍니다.
- 6v6 보드
- 팀업 & 2인 시너지
- 상대 팀 매치업

마블 라이벌즈에는 27명의 Duelist 영웅이 있습니다. 음전자 망토은(는) 0.0% 승률로 그 중 #16위이며, 이는 Duelist 평균 51.7%보다 아래입니다. 도란의 검가 57.6% 승률로 Duelist 카테고리를 이끕니다. 음전자 망토의 0.0% 픽률은 평균 1.5%보다 낮음이고, 0.00 KDA는 Duelist 평균 3.74보다 아래입니다.
| # | 영웅 | 티어 | 승률 | 픽률 | MVP율 | 킬 | 데스 | KDA |
|---|---|---|---|---|---|---|---|---|
| 1 | 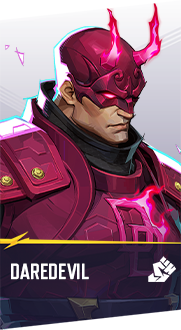 도란의 검 도란의 검 | 도란의 검 S 티어 | 57.6% | 1.9% | 12.8% | 21.9 | 7.4 | 4.03 |
| 2 | 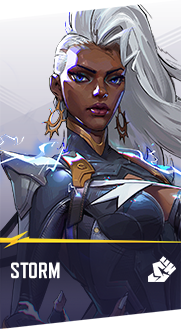 Storm Storm | Storm A 티어 | 56.2% | 0.6% | 6.5% | 23.6 | 6.7 | 7.17 |
| 3 | 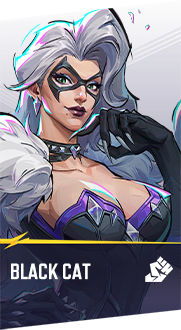 Black Cat Black Cat | Black Cat A 티어 | 55.2% | 0.7% | 8.4% | 18.1 | 6.3 | 3.37 |
| 4 |  천 갑옷 천 갑옷 | 천 갑옷 A 티어 | 55.1% | 1.4% | 10.7% | 19.7 | 7.4 | 2.84 |
| 5 |  Squirrel Girl Squirrel Girl | Squirrel Girl B 티어 | 54.1% | 1.2% | 7.6% | 22.4 | 5.3 | 4.62 |
| 6 |  흑요석 검 흑요석 검 | 흑요석 검 C 티어 | 54.1% | 0.5% | 5.6% | 19.7 | 6.4 | 3.69 |
| 7 |  곡궁 곡궁 | 곡궁 B 티어 | 53.9% | 1.9% | 15.4% | 23.1 | 6.4 | 3.74 |
| 8 |  Iron Man Iron Man | Iron Man C 티어 | 53.8% | 0.9% | 14.2% | 23.6 | 5.9 | 4.10 |
| 9 | 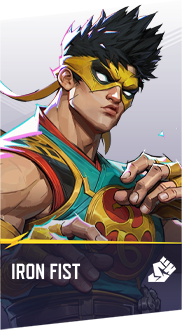 증폭의 고서 증폭의 고서 | 증폭의 고서 C 티어 | 53.6% | 0.9% | 14.8% | 18.6 | 7.0 | 2.82 |
| 10 |  Elsa Bloodstone Elsa Bloodstone | Elsa Bloodstone B 티어 | 53.4% | 3.4% | 25.6% | 23.1 | 6.0 | 4.48 |
| 11 |  Psylocke Psylocke | Psylocke C 티어 | 53.1% | 1.4% | 20.4% | 22.6 | 6.6 | 3.53 |
| 12 |  Moon Knight Moon Knight | Moon Knight D 티어 | 52.3% | 2.5% | 14.3% | 24.8 | 6.8 | 3.76 |
| 13 |  도란의 방패 도란의 방패 | 도란의 방패 D 티어 | 52.2% | 2.6% | 16.3% | 21.6 | 6.5 | 3.70 |
| 14 |  Human Torch Human Torch | Human Torch F 티어 | 51.9% | 0.5% | 12.0% | 21.8 | 6.1 | 3.67 |
| 15 |  롱소드 롱소드 | 롱소드 D 티어 | 51.5% | 2.7% | 11.4% | 16.6 | 7.2 | 2.79 |
| 16 | 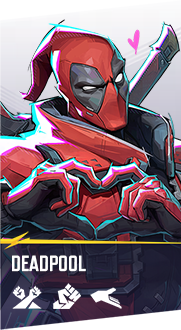 음전자 망토 음전자 망토 | 음전자 망토 D 티어 | 51.5% | 4.6% | 13.3% | 19.6 | 5.9 | 5.16 |
| 17 | 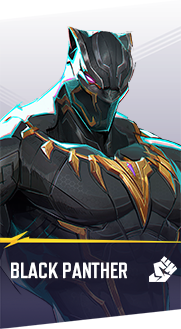 방출의 마법봉 방출의 마법봉 | 방출의 마법봉 F 티어 | 51.0% | 1.0% | 9.4% | 16.1 | 7.5 | 2.22 |
| 18 |  Hela Hela | Hela F 티어 | 51.0% | 1.7% | 10.9% | 21.7 | 6.5 | 3.68 |
| 19 | 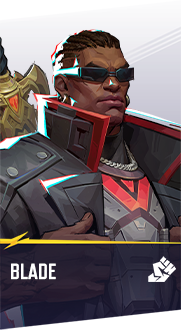 Blade Blade | Blade F 티어 | 50.7% | 0.8% | 12.2% | 20.5 | 7.7 | 3.38 |
| 20 | 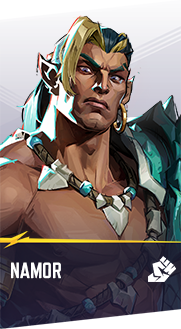 Namor Namor | Namor F 티어 | 50.3% | 2.2% | 17.1% | 25.1 | 6.2 | 4.36 |
| 21 |  Cyclops Cyclops | Cyclops F 티어 | 50.3% | 0.1% | 0.0% | 19.0 | 6.0 | 3.91 |
| 22 | 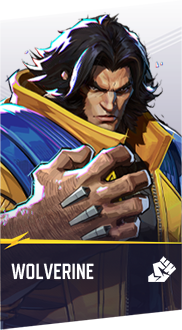 Wolverine Wolverine | Wolverine F 티어 | 50.1% | 1.0% | 7.9% | 18.6 | 7.2 | 3.05 |
| 23 |  B.F. 대검 B.F. 대검 | B.F. 대검 F 티어 | 49.7% | 1.2% | 9.2% | 23.0 | 6.1 | 4.32 |
| 24 |  The Punisher The Punisher | The Punisher F 티어 | 48.6% | 2.1% | 13.0% | 21.9 | 7.8 | 2.93 |
| 25 |  Hawkeye Hawkeye | Hawkeye F 티어 | 48.3% | 0.7% | 8.5% | 19.2 | 7.3 | 3.08 |
| 26 |  Winter Soldier Winter Soldier | Winter Soldier F 티어 | 46.7% | 2.0% | 9.6% | 21.8 | 7.5 | 3.61 |
| 27 |  마법무효화의 망토 마법무효화의 망토 | 마법무효화의 망토 F 티어 | 39.9% | 0.6% | 12.8% | 15.5 | 6.5 | 2.89 |
언제 플레이해야 하나요 음전자 망토
강점
- 핵심 처치를 확보하고 팀 전투를 캐리할 수 있음
약점
- 0.0%의 평균 이하 승률, 현재 메타에서 어려울 수 있음
- 0.00의 낮은 KDA는 생존하거나 킬을 확보하는 데 어려움을 시사
- 낮은 픽률은 커뮤니티 지식이 적고 탐구된 팀 시너지가 적음을 의미
- 피해 출력을 최대화하기 위해 좋은 조준과 포지셔닝이 필요
전략 팁
역할 마스터리
듀얼리스트로서, 음전자 망토은(는) 처치를 확보하고 피해를 입히는 것을 우선시해야 합니다. 뱅가드와 협력하여 기회를 찾고 적의 실수를 활용하세요.
팀 시너지
음전자 망토은(는) Duelist 플레이 스타일을 보완하는 영웅과 가장 잘 맞습니다. 시너지 탭에서 음전자 망토의 최고 파트너를 확인하세요.
카운터 인식
음전자 망토의 카운터를 이해하는 것은 성공에 핵심적입니다. 카운터 탭을 방문하여 피해야 할 영웅과 음전자 망토에게 유리한 매치업을 알아보세요.
Help us maintain accuracy! If you notice incorrect stats, missing data, or any issues, your feedback directly improves the quality of our data for the entire community.
음전자 망토 FAQ
마블 라이벌즈에서 음전자 망토이(가) 좋은가요?
음전자 망토은(는) 마블 라이벌즈에서 0.0% 승률과 0.0% 픽률을 가집니다. 최고 승률은 아니지만, 음전자 망토은(는) 잘 플레이하면 여전히 효과적일 수 있습니다.
마블 라이벌즈에서 음전자 망토은(는) 몇 티어인가요?
음전자 망토은(는) 현재 마블 라이벌즈에서 C-티어로, 전체 54명의 영웅 중 #38위이며 Duelist 영웅 중 #16위입니다. 티어 랭킹은 경쟁 매치의 승률 성능에 기반합니다.
마블 라이벌즈에서 음전자 망토이(가) 메타인가요?
음전자 망토은(는) 현재 마블 라이벌즈에서 메타로 간주되지 않습니다. C-티어 랭킹과 0.0% 승률로, 음전자 망토은(는) 더 강한 픽에 대해 어려움을 겪을 수 있습니다. 그러나 숙련된 플레이어는 적절한 팀 구성으로 여전히 성공을 거둘 수 있습니다.
마블 라이벌즈에서 음전자 망토은(는) 어떤 역할인가요?
음전자 망토은(는) 마블 라이벌즈의 듀얼리스트 영웅입니다. 듀얼리스트는 적을 제거하는 데 집중하는 딜러입니다.
마블 라이벌즈에서 음전자 망토의 통계는 무엇인가요?
음전자 망토은(는) 마블 라이벌즈에서 0.0% 승률, 0.0% 픽률, 0.0% MVP율을 가집니다. 평균적으로 음전자 망토은(는) 매치당 0.0 킬, 0.0 데스, 0.0 어시스트로 0.00 KDA를 달성합니다.
음전자 망토을(를) 효과적으로 플레이하는 방법은?
음전자 망토을(를) 효과적으로 플레이하려면 Duelist로서의 강점에 집중하세요. 능력을 배우고 팀 전투에서 영향력을 최대화하기 위해 포지셔닝을 연습하세요. Wade Wilson is the full package (or so he claims), with devastating damage output, an impenetrable shield, and swift healing. There's no limit to what...
마블 라이벌즈에서 음전자 망토을(를) 플레이하기 어렵나요?
음전자 망토은(는) 좋은 조준과 기계적 스킬이 필요한 듀얼리스트 영웅입니다. 0.00의 평균 KDA로, 성공은 데스를 피하면서 처치를 확보하는 능력에 달려 있습니다. 이동과 타겟 우선순위를 연습하세요.
마블 라이벌즈에서 최고의 Duelist는 누구인가요?
마블 라이벌즈에서 승률 기준 최고의 Duelist 영웅은: 도란의 검, Storm, Black Cat입니다. 음전자 망토은(는) 현재 경쟁 매치 데이터 기반으로 27명의 Duelist 영웅 중 #16위입니다.