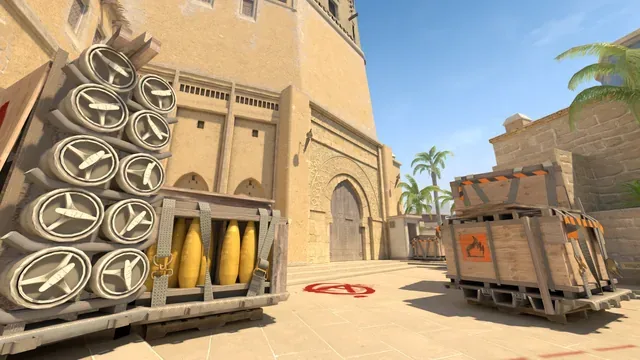
CS2 Mirage Guide: Callouts, CT and T Fundamentals, Smokes, and Real Match Data
Learn Mirage in CS2: official callouts, how to play CT and T side, the smokes that matter, common A, B and mid executes, and side win rates from MetaBot-recorded Premier and Competitive matches.
Mirage is the most-played map in Counter-Strike 2 and the one most players learn first. It has a simple three-lane layout (A through Palace and Ramp, B through Apartments, and a mid that connects to both sites) and very little verticality, so rounds are decided by crosshair placement, mid control and a few well-known smokes. This guide covers the callouts, the fundamentals of each side, the utility worth learning, and what our own match data says about how Mirage plays right now.
Mirage layout and key callouts
T spawn sits on the east side of the map and CT spawn on the west, right next to A, so CTs reach A fastest and rotate to B through Market. Terrorists have three ways in: A through Palace or T Ramp, mid through Top of Mid toward Window, Connector and Short, and B through Apartments. The table uses the official place names from the map files, plus the common community names you will hear in voice chat. You can see every one of them on the interactive Mirage map.
| Area | Official callouts | Community names you will hear |
|---|---|---|
| A site | Bombsite A, Stairs, Jungle, Scaffolding, Connector, CT Spawn | Firebox, Tetris, Sandwich, Triple, Ticket, Default |
| A approach (T side) | T Ramp, Palace Alley, Palace Interior | Ramp, Palace, Under Palace |
| Mid | Top of Mid, Middle, Sniper's Nest, Catwalk, Underpass, Ladder | Window, Short, Chair, Top Con |
| B approach (T side) | Back Alley, House, Apartments | Apps, Bench |
| B site | Bombsite B, Shop | Market, Kitchen, Van, Short B, Default B |
CT side fundamentals
Most teams default to a 2-1-2: two players on A, one in mid, two on B. Mid is the hinge of the map, because a T team that owns Top of Mid can reach Connector, Short and Underpass and threaten both sites at once. The mid player's job is information first and kills second.
- 1Hold mid from Window or Short
An AWP in Window (Sniper's Nest) or a rifler at Short gets the first look at Top of Mid. Take one shot, then fall back toward Connector or Jungle instead of re-peeking a smoked mid.
- 2Stall the A rush
An incendiary on T Ramp or at the bottom of Palace buys several seconds for the rotation from CT Spawn and Jungle. Keep it for when you hear the rush, not for the first ten seconds.
- 3Make Apartments slow
On B, a molotov at the Apartments exit plus a flash for your Bench or Market player stops the classic five-man B rush. Trade off each other rather than both holding the same door.
- 4Retake with utility, not one by one
Mirage sites are small. When a site falls, group up with the rotators and retake together with a smoke and two flashes rather than walking in alone.
T side fundamentals
The default T plan is to take mid control first and decide the site later. Smoking Window from T spawn lets your team take Top of Mid without being picked by the mid AWP, and a Connector smoke cuts the path the A players use to help mid. From there you can split A, fake one site, or push Short to B.
- Smoke CT, Jungle and Stairs to cut the rotation and crossfire
- Molotov the deep corners such as Firebox or Sandwich
- Palace and Ramp swing together after a flash
- Plant default, then hold Ramp, Palace and Jungle crossfires
- Smoke Market Window and Kitchen door to isolate the site
- Molotov Bench and Van
- Flash over the Apartments exit as the entry pushes
- A Short player stops the CT rotation from mid
VerdictA is the more common hit because Ramp and Palace give two entrances at once. B is faster and works well after you have shown A pressure, or with a mid-to-Short split.
Key utility: the six official lineups
Mirage ships with six official smoke lineups inside the map files. We plot each one (throw spot, aim point and landing) on the Mirage lineups page. Four are T-side smokes for mid control and the A execute, and two are CT-side smokes for slowing Ramp and Apartments pushes. Our smokes and utility fundamentals guide explains how to throw jump lineups without a bind.
| Smoke | Side | Throw | What it does |
|---|---|---|---|
| Window | T | Jump throw from T Spawn, standing in the corner against the stairs | Blocks Sniper's Nest so you can take Top of Mid |
| Connector | T | Jump throw from T Spawn, standing in the corner against the trash can | Cuts the path between mid and A |
| Cat | T | Standing throw from the B approach, standing in the corner | Smokes Catwalk (Short) for a mid or B play |
| CT | T | Jump throw from Palace, against the wall at the first corner | Cuts the CT Spawn rotation onto A |
| T Ramp | CT | Standing throw from A site, standing in the corner | Blocks Ramp to slow an A push |
| Apts | CT | Standing throw from B site, standing in the corner | Blocks the Apartments exit onto B |
What our match data says about Mirage
The numbers below come from 87 Premier and Competitive matches (1,742 regulation rounds) recorded by the MetaBot desktop app, plus FACEIT map aggregates. Overtime rounds are excluded from side stats. Treat them as a snapshot of real games at everyday skill levels, not a pro-play verdict. You can browse the live version on the Mirage overview page.
| Metric | Value | Sample |
|---|---|---|
| CT round win rate | 52.2% (95% CI 49.8%–54.5%) | 1,742 regulation rounds |
| T round win rate | 47.8% | 1,742 regulation rounds |
| Pistol rounds won by CT | 48.3% | 174 pistol rounds |
| Pistol conversion (pistol winner also wins the next two rounds) | 42.6% | 169 pistol rounds |
| Team leading at halftime wins the match | 84.7% | 72 matches |
| Matches that went to overtime | 4.6% | 4 of 87 matches |
| Average rounds per match | 20.3 | 87 matches |
| FACEIT pick rate | 28.2% | 89,313 FACEIT matches |
| FACEIT average ADR | 78.5 | 89,313 FACEIT matches |
| FACEIT average utility damage per player | 75 | 89,313 FACEIT matches |
Three things stand out. First, Mirage is close to balanced: CT wins 52.2% of rounds, but the 95% confidence interval (49.8% to 54.5%) still touches 50%. In the Premier-only slice (1,098 rounds) CT rises to 54.0%, which suggests better-coordinated lobbies get more out of the CT setup. Second, the pistol round matters less than people think: the pistol winner also takes the next two rounds only 42.6% of the time, so a lost pistol is far from a lost half. Third, the halftime leader goes on to win 84.7% of matches decided in regulation, the lowest of the three classic maps we track, so Mirage leaves more room for second-half comebacks than Dust II or Inferno.
Get the Winning Edge
Real-time overlays, automatic match tracking, and exclusive tools — everything you need to climb, free on your PC.
- In-game overlays
- Automatic match tracking
- Desktop-exclusive tools
Help us maintain accuracy! If you notice incorrect stats, missing data, or any issues, your feedback directly improves the quality of our data for the entire community.
Guide FAQ
Is Mirage CT-sided or T-sided in CS2?
Close to balanced. In 1,742 regulation rounds recorded by MetaBot, CT won 52.2% (95% confidence interval 49.8% to 54.5%). The Premier-only sample leans a little more CT at 54.0%.
What are the most important Mirage smokes to learn?
Window and Connector for mid control, and CT, Jungle and Stairs for the A execute. Window, Connector and CT are part of the six official lineups shown on our Mirage lineups page.
What is the standard CT setup on Mirage?
A 2-1-2: two players on A, one in mid (Window or Short), and two on B. Rotate through CT Spawn and Connector when you get info.
How often does the halftime leader win on Mirage?
In our recorded matches, 84.7% of the time (72 matches decided in regulation with a halftime leader). That is lower than Dust II and Inferno in our data.
Where can I see all Mirage callouts?
On the interactive Mirage map, which shows every official callout from the map files on the radar, along with spawns and official grenade lineups.